Practical Self Reliance: How to Freeze Vegetables (A to Z Guide)

Ashley Adamant of Practical Self Reliance has another detailed article on How to Freeze Vegetables (A to Z Guide). Many vegetables are covered individually and, as usual, more photos through the link to the original article.

Freezing vegetables effectively preserves them at the peak of freshness, provided it’s done properly.  If vegetables are not properly prepared before freezing, then you might as well skip it altogether.

I know what you’re thinking.  Who needs instructions on freezing vegetables?

You just bag them up and stuff them in the freezer, end of story.

Well, not quite.

Years ago I remember thinking it’d be really convenient to have a freezer full of frozen butternut squash, already peeled and cubed for easy weeknight dinners.  I bought a case of squash, peeled it, cubed it, and packed it into gallon-sized freezer bags for my chest freezer.

When I pulled the first bag out of the freezer I was sorely disappointed.  The squash was rubbery, once fully defrosted had the consistency of a wet sponge.  I literally wrung out a few cubes before I braved cooking them, just to play with their strange sponge-like texture.

It was a disaster, and the butternut squash was completely disgusting.

Freezing changes the texture of some raw foods and had I know that butternut must be blanched before freezing it would have saved a lot of squash that ended up in the compost pile.

Blanching preserves more than just texture, it also preserves quality in some vegetables.  Freezing only slows down degeneration, and enzymatic processes are still happening (though slowly) within bags of frozen vegetables.  They can actually still spoil in the freezer, if not properly prepared.

Every type of vegetable is a bit different, and some can be quickly thrown into bags with no prep at all.  Fear not, I’ll walk you through how to freeze vegetables for peak quality.

Blanching Methods

For those vegetables that need blanching before freezing, there are two main methods: boiling or steaming.

Boiling is simple, but much less gentle than steaming.  The agitation in the water can break apart tender vegetables, and it’s best reserved for firm-fleshed types.  Being submerged in water also causes the veggies to lose more flavor, so it’s often not the best option.

Steaming, on the other hand, is gentle and helps the vegetables retain flavor.  You’ll need a steamer basket of some sort to keep the vegetables suspended over an inch or two of boiling water, but the results are usually better.

Whichever method you choose, steam or boil, and then quickly transfer the veggies to an ice water bath.  This stops the cooking immediately and helps ensure the vegetables don’t get overcooked or soggy.

Freezer Storage Containers

The storage container you choose is nearly as important as the way you prepare vegetables before freezing.  Standard Ziplock freezer bags are one of the most common choices, but they’re not the only option.

  • Ziplock Freezer Bags ~ One of the simplest and most economical options, freezer bags are made of a thicker plastic than regular storage bags.  That helps prevent both leaks and freezer burn, but it’s still important to remove as much air as possible from the bags for the best quality frozen vegetables.  Vacuum sealed bags are a better option for longer storage.
  • Food Saver Vacuum Sealer Bags ~ A better option than Ziploc bags, vacuum sealer bags remove air from around the food and dramatically reduce the risk of freezer burn when veggies are stored for more than a month or two.  It’s a bit of an investment upfront buying a vacuum sealer, but we’ve had ours for over a decade.  It’s literally sealed thousands of pounds of food, and it’s been well worth it.
  • Freezer Safe Gladware ~ Many types of Tupperware are not designed for freezer temperatures and will become brittle in the freezer.  Even once they warm up, they won’t recover and can shatter easily.  If you do use storage containers, choose varieties made from freezer-safe plastic, such as Gladware Freezer Safe Containers.
  • Freezer Safe Mason Jars ~ Some glass mason jars are freezer safe, and they even have a freezing “fill line” embossed on the side.  Be sure to leave around 1 1/2 inches of headspace below the top rim, as the food may expand when frozen.  Only use straight-sided “wide mouth” mason jars, as jars with “shoulders” are not freezer safe and can crack as the food expands.  Jars are best for pureed vegetables (such as frozen pumpkin puree) since it’ll fully fill the jar without air space.

Pumpkin puree ready for the freezer!  Note the straight-sided wide mouth mason jars, which are freezer safe.

How to Freeze Vegetables

Once blanched, most vegetables are then either placed directly into bags, or flash-frozen on baking trays to keep them from freezing together.  This depends on the type of produce.

Asparagus

Home-canned asparagus tends to get mushy, and while pickled asparagus is delicious, it no longer has that fresh green flavor.  Freezing asparagus is the best way to store this short season vegetable.

Blanch asparagus for 2-3 minutes, preferably by steaming since fresh asparagus can be tender and delicate.  Remove the stems to an ice water bath, or place in a colander and rinse with cool water for a few minutes to stop the cooking.

Pat the spears dry and arrange on baking trays.  Freeze the spears on trays for 2-4 hours, until firm.  Transfer the spears to storage bags, press out the air, and seal tightly before storing them in the freezer.

Frozen asparagus will generally lasts 8-12 months if properly blanched and stored in a tightly sealed bag.

Artichokes

Artichokes can be frozen, but only after cooking. If you freeze artichokes raw, they turn brown when unthawed, and their flavor changes. Blanching isn’t enough because it won’t heat the center and cook thoroughly. 

You can find several methods for cooking and freezing artichokes. Here’s one option.

Trim the tops from the artichokes and rub cut surfaces with lemon. Then, cook it in water flavored with lemon juice for preservation purposes. Let it cook for 20-25 minutes. Then, let it drain upside down and place upside down on a baking sheet, and flash freeze on trays before storing in freezer bags.

Make sure you thaw correctly, in the refrigerator rather than on the countertop.  When ready to eat them, wrap each artichoke in aluminum foil and steam until hot…(continues)

The Organic Prepper: How to Start Planning Your Garden

It may be just starting to get into the season season, but it’s not too early to start thinking about your garden. If seeds are as scarce as last year, hopefully you’ve already been making some plans. Here is Joanna Miller at The Organic Prepper with Growing Vegetables Is Back in Style: Here’s How to Start Planning Your Garden to get your thoughts moving in the right direction.

Whether you celebrate St. Bridget’s Day, Candlemas, Imbolc, or Groundhog Day, February 2 is coming up. For those of us active in gardening and raising animals in the Northern hemisphere, this means it’s time to think about spring. And that means garden planning!

The pandemic has caused one very positive resurgence: growing food is back in style and no longer the purview of hippies or those crazy preppers.

Last year saw a record amount of people start gardens

Between the cost of food, grocery shortages, and sheltering in place, it comes as no surprise that many Americans have turned to gardening. And they’re doing it not only to keep themselves busy, but also to keep themselves and their families fed during these turbulent times. More people than ever are learning that not only does gardening produce food, but it also soothes the soul.

However, as the Wall Street Journal pointed out in an article about wannabe homesteaders, many people found out that gardening was a little more complicated than Michael Bloomberg said. ( “I could teach anybody, even people in this room, to be a farmer. It’s a process. You dig a hole, you put a seed in, you put dirt on top, add water, up comes the corn.” 2016-Bloomberg)

Thousands of quarantined Americans planted vegetables last spring, striking a blow for hope just as their World War II-era forebears did with home-front Victory Gardens.

Six months later, many are admitting defeat.

“My tomatoes look like a Dr. Seuss plant,” said Doni Chamberlain, a 64-year-old blogger in Redding, Calif. “It might not have helped that I planted them in a kiddie pool.”

Daisy has an article about the year she and a friend tried to raise a homegrown Thanksgiving, and some other tips for what you can do if the garden you’re relying on fails.

Garden planning varies widely based on your location.

I have gardened with varying degrees of success in the Chicago suburbs, Houston suburbs, and now on the High Plains in Colorado. What works in one area will often not work in another, and the first thing to do is to ask yourself what will grow well in your area.  

For example, some tomatoes will grow just about anywhere, but timing and varieties will vary greatly between regions. In Illinois, you start tomatoes from seed in March, then plant them out sometime between Mother’s Day and Memorial Day. We grew all kinds of tomatoes in Illinois. We could grow cherry tomatoes or those big beautiful slicing tomatoes.

I soon realized I needed to change my view when it came to tomatoes

When I moved to Houston, the tomatoes I planted in May didn’t produce a darn thing the first year. I did some reading and found that tomatoes won’t set fruit if the temperature is above 95 degrees Fahrenheit during the day and doesn’t drop below 75 at night. Well, in Houston, that’s at least from May to October.

So the next year, I started the seeds in January and put them out on Valentine’s Day. Sure enough, the fruits set in March and April, before the heat hit, and we spent June and July picking tomatoes.

I found that I needed to explore different varieties and experiment

I tried both cherry and slicing tomatoes. The cherry tomatoes exploded; I’m not sure if I ever grew a slicing tomato. While living in Houston, I assumed it was too hot to grow the slicing tomatoes and contented myself with the cherries.

I gardened for five years in Houston before moving to Colorado and became very proficient. We only had a little suburban lot, but it was quite productive. When we moved to Colorado, I wondered if I’d be able to grow bigger tomatoes, like I had growing up in Illinois. I planted the same cherry tomato variety I’d grown in Houston, and also some Brandywine tomatoes. The cherry tomatoes did okay, but I didn’t get one Brandywine.

I went back to online searches and gardening books.

It turns out bigger tomatoes need relatively constant temperatures to set fruit. The 85 degree days and 65 degree nights in Illinois were perfect; the 90 degree days and 55 degree nights in Colorado, not so much. A certified organic vegetable gardener lives two miles away from me, and she grows beautiful large tomatoes, but she grows them in a hoop house, which moderates the temperature.

It took me a few years of experimenting to find that Principe Borghese are the tomatoes for me to grow. They do well in the hot, dry weather and are perfect for sun-drying. I now get plenty of tomatoes every year, but it didn’t happen right away. It took some research in the form of flipping through books and asking neighbors. It took a lot of patience.

Gardening is a skill learned by trial and error.

It takes time to find what works in your area, and even then, disaster can strike.

We had a warm, wet spring in 2020. Our last freeze was in April, and we didn’t get one May snowstorm. I had plenty of fruit set throughout June and thought the year would be great. Well, early in July, we had twenty minutes of marble-sized hail and 50 mph winds. My garden was in tatters. The hailstorm knocked my tomatoes and cucumbers off the vines and tore my corn and squash to ribbons.  

I say this not to discourage anyone, but to show that gardening always turns into more of an adventure than people expect. If you stick with it and find what works, you will usually come out ahead in terms of food and fun versus time and energy. But like any sincere endeavor, there will be occasional spectacular failures.

However, I have had occasional unexpected successes as well

This year, the hailstorm didn’t affect a new plant I had tried. I had read about ground cherries in the Laura Ingalls Wilder books. Ground cherries are native to North America, and they look kind of like tomatillos though they taste very sweet. The fruit grows underneath thick leaves in a papery husk. So while the hail bruised the thick leaves, they protected the fruit underneath. I didn’t lose fruit in that hailstorm and was pleasantly surprised later in the season by the plants’ heavy production.

Gardening is a worthy endeavor. If you felt the urge to garden last year and it just didn’t come together the way you envisioned, now is the time to revisit what worked and what didn’t.

Where should you plant your garden?

Decide where to plant your garden first. You will need to check your local rules and regulations. (Here are some tips for growing food when you”can’t” have a garden.) Wherever you intend to plant, make sure there is enough direct sunlight.

If you live in a place like Texas and find it is too sunny for some of your plants, it’s a lot easier to put burlap over your plants to provide partial shade than it is to trim tree branches overhead if the garden isn’t getting enough sun. So start by finding a sunny spot, and go from there.

If you use containers, read the instructions. Many larger pots will recommend placing a layer of rocks or pea gravel in the bottom to assist drainage. If you live in an area with a high water table, it may be worth your time to build a raised bed. It doesn’t have to be super expensive. When we lived in Texas, we just bought cinder blocks and tore up the grass inside, then added some compost. I want to conserve as much moisture as possible in Colorado, so I haven’t raised the beds. The water drains just fine on its own.

What kind of soil do you have?

When I lived in Illinois, we had just about perfect soil. It was black and rich and loamy, and we had productive gardens without adding much in the way of specific soil amendments. In many other parts of the country, however, that is not the case. 

What you decide to do depends on how much money you have available. It may be worth your time to get a soil test. In Colorado, this costs about $30, and it is useful. You send in your soil sample, and they tell you not only the pH but also any nutrient deficiencies your soil may have.  

If you have some money to spend and are confident in your ability to add the proper amendments to your soil, the soil test is worth your time and money. It can save you a few seasons’ worth of trial and error. However, if you are distressingly tight on cash, don’t despair. If you eat, you can still improve your soil.  

What can you do to improve the soil?

Many useful guides exist on composting. All you have to do is enter “How to make compost” into your favorite search engine, and plenty of sites and videos will pop up. Much of your food waste can be used for compost. Lawn trimmings and downed leaves can go in as well. If you want to build up a lot of soil, you can ask neighbors for their leaves and other yard waste.

My kids and I volunteer at a park, and we took their Christmas tree home after the holiday to feed our goats. Organic waste is all over the place. Your neighbors might tease you for being a hippie with all the compost and garbage collecting; tell them sticks and stones. Building your soil with compost alone will take time, but it’ll be free.  

Remember to do your research first

A green bean that grows well in New York will not necessarily grow well in East Texas, which won’t necessarily grow well in South Texas, which won’t necessarily grow well in Oregon.

Don’t just grab whatever they have at the hardware store. The major chains usually source from large nurseries that ship nationwide; if you don’t know what you’re looking for, you may find something inappropriate for your area. If you have a smaller, locally-owned nursery, browse that instead. They may sport higher prices, though not necessarily. But staff at locally owned nurseries have often gardened in that specific area and can offer a great deal of information.  

Once you’ve picked out varieties, look carefully to find when and how to plant. For example, I plant peas and potatoes in April. We usually have freezes into May, but peas and potatoes survive if they have a thick layer of mulch. Peas prefer cooler weather and come out of the garden at the end of July. Tomatoes don’t go outside until all danger of frost has passed. In my area, that’s usually mid to late May. Corn doesn’t go in until the soil has warmed in June.

You can’t just toss seeds into the ground whenever, wherever, and expect them to thrive. Take time to figure out your gardening zone and read the seed packages carefully. This Garden Planning Calculator from Seeds for Generations provides you the following for 46 types of crops:

  • Germination timelines for all crop types
  • Germination temperatures for optimal results
  • For plants that need to be started as seedlings, then transplanted into the garden, the Indoor Start Date
  • For plants that are direct seeded, the earliest date to plant them outdoors
  • For seedlings, the earliest transplant date relative to the last frost
  • AND, it provides you with forecast earliest harvest dates based on the days to maturity for each crop

TIP: Now that more people are gardening, it’s a good idea to order your seeds early to ensure the best selection. Last year, many sources ran out of seeds quickly so do not delay your purchase. Seed shortages could occur again.

Gardening is ultimately responding to the needs of other living things

It requires patience, willingness to get dirty, and the ability to recover from failure. These are not skill sets that our society typically values. I found the stories of successful professionals who couldn’t keep a plant alive for a few months disturbing. 

The nation that won the World Wars was the same nation that produced over 40% of its produce in the backyard and rooftop Victory Gardens. I suppose it’s not shocking that the nation that now cannot wait three days for a package from Amazon cannot be bothered to learn about where its food comes from, but I don’t think it’s a sign of its progress. I think it’s a sign we all need to do some soul-searching.

Of course, the nation that grew Victory Gardens was also much closer, generationally, to a society of mostly farmers. Most people 80+ years ago still had relatives in the country to whom they could turn for advice. More people kept livestock. Parenting was typically more hands-on. In general, more people spent more time in their lives as caregivers...(continues)

AmPart: The Kung Fu Virus 2020 Victory Garden

Johny Mac at American Partisan talks about getting his 2020 garden started in The Kung Fu Virus 2020 Victory Garden. He’s in the cold zone 5, so while his dates for doing things may not apply to your zone if you’re in a warmer or colder zone, the things he does would be similar. You can find your zone on the USDA plant hardiness zone map, but you may also want to talk to a knowledgeable neighbor. You may live a micro-terrain that makes your garden area slightly warmer or cooler than what the official zone for your larger area is.

I am a man that believes in insurance so I invest in many different kinds; auto, boat, house, life, and food insurance come immediatly to mind. Yes food insurance and the way things are today with the Kung Fu Virus I am starting to wonder what will happen with food availability in the future. Well no worries, as I invest in food insurance by growing approximately 80% of our yearly need of vegetables in our garden.

I have written an article or two about this subject in the past and am being told to do it again by the good Lord. What I am going to share works for us in our area. I live in zone 5 which means that the last frost for my area is around May 21st. Nobody in my area plant above ground seedling’s till Memorial Day weekend because we have experienced frost up to that date. Just look at the photo header taken this past Saturday morning at 0700 hrs eastern.

Below ground vegetables like, carrots rutabagas, beans, etc can be planted around the end of April here. I reserve my raised beds, which I have three for early lettuce and radish crops because the raised beds soil is warmer and if there is going to be a frost I can cover those beds easily. The above mentioned vegetables I sow directly in the soil but because my farming season is so short, I start above ground seeds inside typically around St. Patrick’s Day.

I only use heirloom seeds and keep seeds from one year to the next. Folks in our group trade same specie seeds every year to keep the strain vibrant. I start out growing inside with tomato seeds then move to sweet peppers. The peppers seem to take the longest to germinate. Once I have those seeds started I move to cucumbers – Pickling and salad of course. I found the easiest way to start the seedling’s is to poke a hole is foam egg cartons, add potting soil, and place 1 to 2-seeds in each nook then cover with a light layer of soil. Then put the egg cartons in plastic trays under my growing lamps with cellophane over to keep the soil warm and moist which acts as a mini hot-house. Depending on variety, the seedling will start to show themselves after 7 to 14-days. Once the seedlings have sprung from the soil I remove the cellophane from the plants.

2020 Seedlings

Once the seedlings have lost their baby leaves I transplant the seedlings into Solo cups. I do not know why but the plants like the Solo cups to grow in. I keep the cups year after year so I get my moneys worth. The bottom of the Solo cups I perforate with my pen knife so they drain. Once the seedlings have 2-sets of leaves I only water the plants from the bottom. Since I have perforated the bottom of the cups I keep about 1/2-inch of water in the pan and they self water themselves. Doing this helps to develop a great root system. By the beginning of May, I move my trays of plants to a makeshift green house outside. At night I have an electric heater that has a thermostat to keep the temperature in the green house at around 68 degrees F. By mid May I do not use the heater anymore and allow the plants to harden.

Memorial Day Weekend 2019 – Seedlings Ready to plant

While this is going on I get the garden and raised beds ready for planting. In early April I rototill the garden. Once tilled I clean out the manure from the chicken coop. The manure collected in April is just enough to spread around the garden and till into the soil. Depending on the weather I hand turn the soil in the raised beds and toss my lettuce, radish, cilantro, and dill seeds onto the soil. The seeds are followed with a light raking to set the seeds. By Memorial Day we start to have fresh salads. If frost is predicted it is very simple to drag an old sheet over the plants to protect them.

Right after I plant my salad seeds, I plant potatoes and rutabaga seeds. I use the tire method for the potatoes to make taking care of them a lot easier. The rutabaga seeds get planted about 6-inches apart and 1/2-inch deep. Then I cover the rutabaga seeds with two sheets of 50# 48″x 8′ newsprint paper with slits in the paper to match up with each row of rutabaga seeds planted…

Click here to read the entire article at American Partisan.

A Piece of Rainbow: Veggies & Herbs to Regrow from Table Scraps

Perhaps you are having trouble finding seeds to grow your survival garden. Some food can be grown from the scraps of food that you may already have on hand. A Piece of Rainbow has the article12 Best Veggies & Herbs to Regrow from Kitchen Scraps. If you do an internet search for “gardening with kitchen scraps” you will get a good number of web pages with similar titles. A Piece of Rainbow’s pictures seemed to be the easiest to understand with links to more detailed instructions. If you need more ideas on what scraps to use, then go ahead and hit that search link.

For a survival garden, or what the pandemic intarwebz are calling a victory garden, you want calories first and a balanced diet second. You’ll perish from a lack of calories long before you succumb to the illnesses associated with various vitamin and mineral deficiencies. With that in mind, the heavy lifters of garden calories are potatoes, beans, squash, and grains. You can include sweet potatoes and yams with regular potatoes. While potatoes, beans and squash are all covered to some extent in the articles on kitchen scrap gardening, most of the options are for greens. Those are great for vitamins, minerals, and variety of diet, but don’t yield a great many calories. But if you’re only supplementing other food supplies on hand, then they are a bonus.

If you’re really relying only or mostly on what you can grow, remember that there are a lot more edible and nutritious parts of garden plants than just the fruits and vegetables that you see in the store. Melon and squash seeds are packed with protein and some fats. Watermelon rind has some vitamin C and B6 as well as fiber. Zucchini stems can be cooked like penne pasta. The leaves of many plants are edible. Even some plants considered weeds by many are highly nutritious, like purslane. And if you’re lucky enough to be plagued with dandelions, the entire plant is edible from flower to root.

Click here to  read the entire article at A Piece of Rainbow.

Preparedness Mama: DIY Composting at Home

As long as we’re talking about gardening, let’s talk about composting. Composting is a good way to turn your yard waste, kitchen waste, and even paper waste into delicious, delicious garden food. Here is Preparedness Mama talking DIY Composting at Home

One of the easiest projects that you can do when it comes to gardening is to build a compost pile. It is also one of the most important parts of your garden. A compost pile offers some great benefits for both the soil and your fall cleanup efforts. In today’s article, we are going to go over the ins and outs of how to make a compost pile at home. But first, we will highlight some of the neat benefits of having your own compost pile.

how to build a compost pile at home
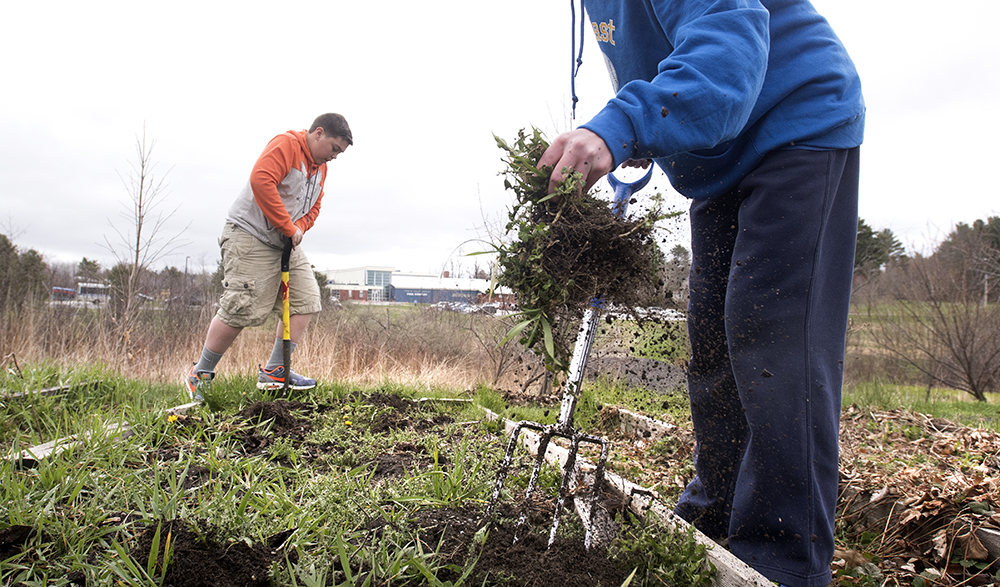
What Is a Compost Pile?

For individuals who don’t know, a compost pile is simply a pile of leftover organic scraps. These scraps can come from the outdoors, your kitchen, and even leftover animal waste. You might be wondering why anyone would ever want to collect compost, well, compost can provide the nutrients that your soil and plants need. A compost pile also feeds microbes that are beneficial and ensures that it will keep all the resources that are valuable out of the landfills.

As the organic material begins to breaks down, the nutrients and minerals feed the soil and give an overall boost of health to your garden. For gardeners who are looking to add that additional boost in a timely manner, composting is the solution that they seek.

Why You Should Build a Compost Pile

From financial reasons to environmental ones, there are so many reasons why you should learn how to make a compost pile. Let’s take a look at some of the top ones.

Less Waste

One of the best benefits of a compost pile is the significant reduction of waste it provides. When you are cooking or cleaning around the house, you will find that a lot of the items you come across can be composted. By composting, you get the benefit of being environmentally conscious all while putting resources back into the Earth. It is almost like having a mini recycling plant in your own backyard.

You Can Create a Rich Fertilizer

If you are a natural gardener, then you will love the fact that composting can provide you with having a nutritionally rich fertilizer. Having a fertilizer that is rich in minerals and nutrients can help you in having a successful harvest. Whether it be vegetables or flowers, a rich fertilizer can be the difference between a dull garden and a bountiful one.

Composting Can Help You Save Money

Once you learn how to make a compost pile, you will soon feel the financial benefit of it. For starters, if you pay per bag for garbage collection, you will notice that you will be throwing out less. This means more money in your pocket. Not only that but when it comes time to garden, a compost pile can be super helpful in saving you money. You no longer have to spend piles of money on buying fertilizer..

Composting is Good for the Environment

From reducing toxins to helping keep organic matter out of landfills, composting is proven to helping keep the environment clean. When you compost, you help return soil that has been infused with pesticides and other toxins back to a healthy state. Not only that, but composting helps to keep such toxins out of essential resources such as water supplies and other plants too.

Now that you have a general sense of how beneficial composting can be to a community. Let’s dive into the specifics of how to make a compost pile right at home… (continues)

Click here to read the entire article at Preparedness Mama.

Lovely Greens: Grow a Rapid Response Victory Garden

Tuesday was rain, ice pellets, winds and sun. Wednesday was ice pellets, rain, wind and sun. Welcome, Spring. Despite the less than delightful weather, thoughts turn to gardens. We already had lettuce and pea seeds in the earth. Kale and rhubarb are already doing fairly well, and the berry plants are leafing. In these difficult times, more people are thinking about growing a garden or at least trying to raise some sort of food of their own because of supply chain grocery fears. Lovely Greens has a nice article on Growing a Rapid Response Victory Garden, focused on food that will mature relatively quickly – 30, 60 and 90 days.

You’ve just decided that it’s time to grow a vegetable garden, and not just any garden, a rapid response victory garden. Here’s how to begin and a guide to crops that will mature in 30, 60, and 90 days. Full video at the bottom.

It was just after five am and I was lying in bed, scrolling the news, Facebook, Twitter, everything. I’m not usually awake this early, but we live in different times. Seemingly overnight, our way of life has changed, and a lot of us are feeling anxious for ourselves, our loved ones, and the future. Then I came across a call for help: “…I wish someone would write an article about plants one could sow NOW that could produce food in the next 30, 45, 60 days.”

I could do that, so I’m up now and answering the call. It’s an entirely understandable question since folks are putting two and two together. Even if you have a healthy supply of food now, what will happen this summer? Will there be food shortages? Will my family go hungry? Maybe it’s time to revive the Victory Garden – to plan for the future, just in case.

For the moment, supermarkets are not out of food, but I have seen a couple of worrying signs. A health-food shop that I frequent is out of dried foods “for the foreseeable.” I’ve also seen one person reporting that crops are being abandoned in Kenya, though at the time, the country had only a single confirmed case of Coronavirus. It makes me wonder how less-developed places will cope with the virus, and with food production. Could we see imported food quietly disappear from our supermarket shelves? At least for part of this year?

I’m not an alarmist, but I’m sure I’m voicing a thought that many of us share. That’s why starting a vegetable garden now, even if you have zero experience, is something to consider. Even if a cure or vaccine is developed next week, or next month, having those plants in the ground will benefit your health and your table. Growing your own food is good for your physical health, nutrition, and mental clarity. From a psychological perspective, I believe that it will help you feel more secure. It does for me.

Before we get to what you can grow, I need to announce something else that is worrying. You’re not alone in wanting to grow your own food for the first time –  online seed companies and seed suppliers have been inundated with orders. So much so, that many have closed because they are overwhelmed or sold out of seeds.

If you’re finding it challenging to source seeds online, you should try to get to a physical shop, if you can do so. I’ve not seen any local garden centers sold out of seeds yet, but that may change in the coming weeks. Hardware stores, and sometimes supermarkets will also have a small selection of seeds. You can also ask friends if they have any seeds or plants to share or organize a virtual seed swap. Seeds and plants can be posted or left on door-steps if people are self-isolating…

here are probably hundreds of books sharing how to grow vegetables, and I can’t fit it all into just a couple of paragraphs. Just remember that they are living things and will need light, warmth, nutrients, water, shelter, growing supports, and protection from predators and disease. Fruit and vegetables are just like animals – some grow in the tropics, and others live in temperate regions. You can fake those environments by growing crops in greenhouses or hydroponically. Pretty much all the details of gardening fit into these themes.

You should also familiarize yourself with your gardening zone, and which crops grow best in it. I go over zones and the earliest seeds you can sow every year over here.

Feel free to read my pieces on starting a garden, common gardening mistakes, and watch the videos I shared of how I created my allotment vegetable garden and home raised bed garden on YouTube (please subscribe too)…(continues)

Click here to continue reading at Lovely Greens.

As for getting seeds if you don’t have them… Some online resellers are out of stock because of the volume of people planting gardens for the first time. In some areas, seeds are considered a “non-essential item” that physical stores are not allowed to sell in person. Territorial Seed Company still has seeds in stock, but they are having shipping delays because of high demand. Seeds of Change appears to still have seeds and be taking orders. Burpee appears to have seeds. Wild Garden Seed appears to have stock Filaree Garlic Farm is still open; they’re a small farm specializing in garlic, shallots, asparagus crowns, seed potatoes, and sweet potato slips. Seed Savers Exchange is not taking new orders, but if you join the exchange you may be able to get seeds from other members. And, of course, if you live in an area where seeds are not considered a non-essential item, you may still be able to pick up seeds at a local store.

Wholefully: How to Build a Cheap and Easy Emergency Vegetable Garden

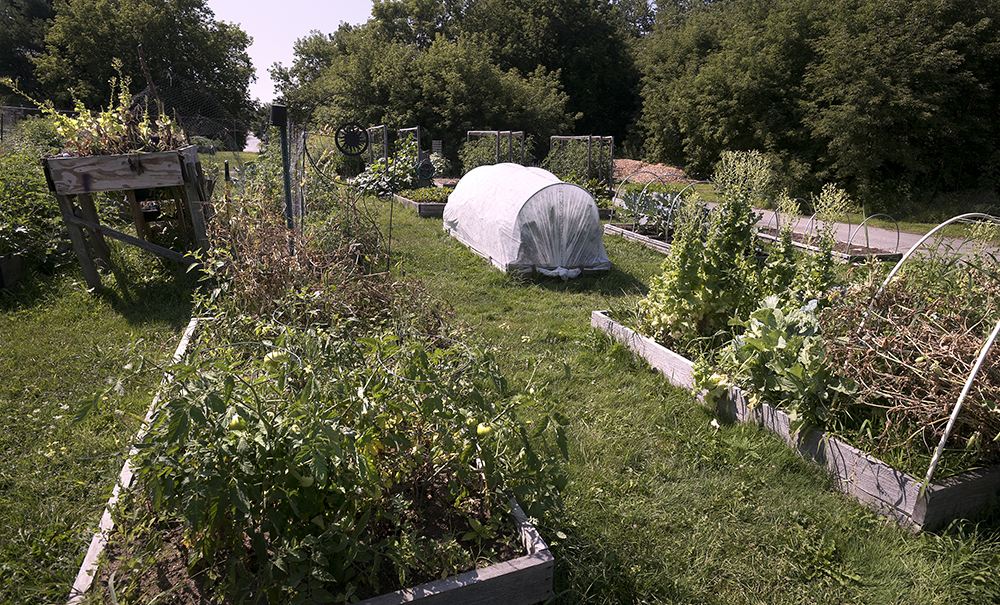
Cassie Johnston at Wholefully has put together a guide on emergency gardening for those who are thinking that maybe this pandemic won’t just be over in two weeks or feels like maybe the grocery stores won’t be as full as you’d like any time soon – How to Build a Cheap and Easy Emergency Vegetable Garden

I once heard that when an emergency happens, it’s not what you have that’s most important, it’s what you know. I’m not sure I really grasped how true that was until we landed ourselves in a global crisis.

While some people have gotten comfort from stockpiling toilet paper, throughout this, I’ve found great comfort in my gardening, preserving, herbalism, and general homesteading knowledge. Even the most robust stockpile runs out, but my ability to grow my own food and medicine never will.

Over the years, we’ve done a good amount of high-quality gardening content here on Wholefully—but that was more from a hobbyist perspective. This article is different, because the times right now are different. This article is designed to teach even the newest of gardening newbies how to plant an emergency vegetable garden (AKA: a survival garden) in even the smallest of spots. Below you’ll find the quick and dirty basics for getting a garden set up on the cheap, what plants I would put in my survival garden, and how to maximize space for food production.

A word of warning: this isn’t going to be an Instagram-worthy #plantlady garden. This also isn’t going to feed your entire family or give you the prettiest heirloom tomatoes. But what an emergency vegetable garden can do is give you some supplementation to a diet heavy on pantry staples, plus give you a much-needed physical and mental outlet for anxiety. It also helps you reclaim just a little bit of control in this uncontrollable situation, and that’s a win.

Where do I even start with gardening?

We’re going to just cover the extreme basics of gardening here to get you started with an emergency vegetable garden, but we highly recommend consuming more gardening information to maximize your growing potential. Here are some resources:

How do I build emergency vegetable garden beds?

If you have some sort of outdoor space that is exposed to the sun for at least 4-6 hours per day, you can grow your own food.

If you have a balcony available: Collect as many large containers as you can find. These don’t have to be traditional pots—whiskey barrels, five gallon buckets, and even small trash cans work. Just make sure you poke or drill holes in the bottom of repurposed containers for drainage. If you are buying new, I really like the fabric smart pots that are out now. They are affordable, easy to grow in, and you can get them in a variety of sizes. Also, don’t forget that you can grow in hanging baskets!

If you have a small amount of greenspace available: A single 8’x4′ raised bed or even a square 4’x4′ bed can produce an absolute TON of food. If you have a patio or a small yard, a raised bed is the way to go. These are the plans we used for our lifetime raised beds, but they are pricey to build and probably not the right option if you are building a survival garden. If you want to do it affordably and quickly, I highly recommend using half cinder blocks to form the outside of your bed. Half cinder blocks (AKA: 4″ cinder blocks) run around $1.50 each, and you can build a very sturdy 8’x4′ bed with them for less than $30. It takes less than 20 minutes to form the bed, and you can also grow herbs and flowers in the holes of the cinder block—utilize every space you have! We used this method in our apartment garden in the city (off the side of our patio), and it worked well for us for years.

Of course, you can also repurpose other materials if you have them available. Bricks, wood, and tires can all be used to create garden beds. Anything that can hold soil in will do the trick—again, it might not be Instagram worthy, but it’ll grow.

How do I prep the site before I put the beds down?

First, you’ll need to remove any sod (grass) that’s below where your raised bed will be. If you have time on your side, you can use a tarp or black plastic and stake it down at the bed site—leave it for a few weeks to cook in the hot sun, and the grass will die. Time not on your side? Use a spade or shovel to cut out the sod. Then place the bed right on top. The more you kill the grass underneath, the less you’ll have to worry about weeds poking through your garden.

If you’d like, you can also put landscape fabric down to protect from more weeds popping up, although that’s definitely not a necessity…

Click here to read the entire article at Wholefully.

Related:

Vegetable Gardening with Lorraine: Survival Gardening

Backdoor Survival: 13 Best Staples for a Survival Garden

Survivopedia: Survival Garden Basics

Organic Prepper: Eating What We Grow

As Spring begins to sneak across the land, thoughts turn to gardens. Here are some thoughts from Kara Still at The Organic Prepper on growing and foraging food – Eating What We Grow: What We Learn and What We Love.

I grew up in Alaska. My family bought most of what we ate at the store, shipped in from the “Lower 48,” as the rest of the U.S. is known up north. The supply chains were long and fragile, and the produce was both expensive and terrible. Wilted lettuce, fuzzy strawberries, bruised apples. I couldn’t imagine why anyone would eat a peach or an ear of corn on the cob because after weeks in transit these delicacies taste like cardboard (or like rot). I ate ice cream, frozen hash browns and plenty of McDonald’s. Alaska is America, after all.

There was also another cuisine in my household, one born out of connection to the land. My family picked tart wild blueberries on the steep mountainside, with the tundra a spongy vermillion carpet around us and the first snows dusting the bare peaks above. We spent hours on icy glacial rivers or motoring past a pebbly shore, casting after salmon and halibut. We scoured the woods for wild mushrooms: nutty white King bolete (porcini), sweet-sour butter bolete, blue-bruising birch bolete, shaggy manes, and oyster mushrooms.

My eyes were opened when I was able to access other foods.

I got so sick of salmon that I refused to eat it, but the joke was on me because the salmon was already in my soul, residing there as a deep curiosity about unusual foods. As I attained adulthood and went traveling I sampled a long list of strange stuff: raw whitefish roe and muktuk (raw whale skin with the fat still on) in rural Alaska, alpaca and guinea pig in Peru, kangaroo and saltwater crocodile in Australia. I nibbled whatever was available: feijoa and loquat and dragon fruit, carpenter ant and raw jellyfish and bladderwrack seaweed, oysters smashed open on the beach.

This isn’t as strange as it sounds. Dr. Weston A. Price, the author of the classic book Nutrition and Physical Degeneration, was a dentist who traveled the world in the 1930s to document what people ate. His research includes 500 pages of pictures of people’s mouths and long lists of who did and who did not have cavities. At the edges of the Earth, Dr. Price found healthy people thriving on almost every imaginable diet: dried fish with a little oatmeal and cabbage in Scotland, cattle milk and blood plus wild vegetables in Africa, seal or caribou and berries in Alaska, cheese and rye bread with a little cabbage in alpine Scandinavia. Their teeth were flawless, their faces beautiful.

Not everyone was healthy, though. Some places Price visited, most people had had every tooth pulled from their heads by the age of 20. Some populations also had underdeveloped chests, high incidence of tuberculosis, crowded mouths and facial deformities, all from lack of nutrients. These folks were not eating a wide variety of different diets. They were all eating the same diet, which mostly consisted of white flour and jam.

There isn’t one perfect diet, because humans are omnivores that can thrive and be healthy on lots of different sets of foods. Just not on white flour and jam.

Now we’re eating wild and foraged things, plus what we grow.

These days, I live on a little homestead in rural North Carolina. My family has 17 acres of mixed woods and overgrown fields, with a pond and a stream. We have a little house we built with our hands, a garden, a young orchard, a few goats, chickens and geese.

We still eat wild things, mostly violets and sheep sorrel, chickweed, wild spring onion, a few puffballs and blackberries, bass out of the pond. One year we found a bumper crop of shaggy-bark boletes that taste like the butter boletes I grew up with. One year I killed and cooked an egg-stealing rat snake (it made fine tacos).

But my county is farm country, a thoroughly humanized landscape since before Columbus when the natives burned the undergrowth to create a fantastically productive landscape that white settlers thought was a park. If we want to eat from the land rather than the Walmart (and we do), most of that food has to be encouraged to grow, not just hunted and gathered.

Growing food is a fascinating and complex endeavor fraught with failure and surprise. My favorite potatoes and English peas are tougher to produce here in the baking south than in the frozen north. Instead, I’m gradually learning to grow exotic things even the luckiest Alaskan gardener can only dream of, like eggplant, grinding corn, hot peppers, and sweet potatoes.

Some growing seasons are successes and others are lessons.

This year was an education in drought. In June we had a 100-year flood that took out the bridges on two of the four roads into our property. Nine months later, those bridges still aren’t fixed. After that deluge, it hardly rained for three months. Seminole pumpkin, for several years running a heavy producer, utterly failed because of squash bug combined with too little water. My tomatoes made only enough for the table and about 15 jars of salsa. I have a brand new solar dehydrator, and I was looking forward to dried tomatoes with everything. Instead, I have more frozen green beans than I know what to do with…

Click here to read the entire article at The Organic Prepper.

Hello Homestead: How to Prepare a Raised Garden Bed for Winter

This article from Hello Homestead includes a step on adding season extenders like the cold frames discussed in an earlier post. Getting that garden properly put to bed for the winter (or keeping it working over winter) is not accomplished by stopping gardening for the winter, much though that might appeal.

How to prepare a raised garden bed for winter

Photo by Gabor Degre

When the gardening season comes to an end, it is easy to get distracted from the pre-frost clean-up. Learning how to prepare a raised garden bed for winter, though, is essential to prepare for the season to come, even when spring is months away.

Throughout autumn, gardeners with raised beds should take several steps to ensure their garden beds are ready for next year’s seeds and seedling transplants.

“It’s an ongoing project,” said Kate Garland, horticultural specialist at the University of Maine Cooperative Extension. “I just always think of it as a to-do list for the fall.”

Properly caring for raised garden beds before winter settles in will promote soil health, ward off weeds and prevent diseases in next year’s crops. Here is how to prepare a raised garden bed for winter.

Step 1: Remove weeds

Photo by Gabor Degre

Weeding is essential well into the fall, even when the majority of your crops have stopped growing. Not only can untended autumn weeds harbor disease, but they can lay the roots for future weed problems.

“This is when people are ready to be done with weeding, but this is probably one of the most important times of year to be weeding,” Garland warned. “A lot of our weeds are setting seed right now. Some of the seeds can stay viable for 30 to 40 years or longer.”

For the parts of your raised bed that’s simply carpeted in weeds, cover them with black plastic or a layer of cardboard and leave it in place through the winter season to choke out existing weeds and suffocate sprouting weeds.

Some gardeners will till the soil to prevent weeds and expose harmful pests, but Garland suggests avoiding tillage in your raised beds as much as you can for the sake of soil health.

“There are some scenarios where [tilling] can make sense, but it doesn’t seem to make a lot of sense in raised bed settings [unless the soil is really compacted],” Garland said. “If you can avoid tilling as much as possible, your soil and your gardens will thrive in the long run.”

Click here to continue reading at Hello Homestead.

Off Grid Survival: Cold Frames for Food Gardens

Cold frames have been used for hundred of years to extend food growing into the colder parts of the year. The Romans used cold frames of straw or stone and used sheets of mica for lids. A greenhouse may be heated, but a cold frame typically warms up only with the sun. If you end up in a situation where you need to rely more heavily on the food that you can grow yourself, cold frames allow you to harvest more food into the winter when you would normally have to rely on food you were able to story during the summer and fall.

This article from Off Grid Survival gives you an overview the cold frame and how to make some – Cold, Hard, Survival: Why Cold Frames Are Essential for SHTF Food Gardens.

Toward the end of summer or early fall, it may seem too early to start thinking about winter. And it may be too late to start thinking about a solid harvest. But when it comes to survival, you’ll need to consider the importance of surviving through winter and what you can do now to survive long-term.

Sure, hunting or fishing might get you by if you’re skilled enough. And food stores might help to supplement any fresh kill or frozen meats. But the real challenge is providing yourself and your family with access to fresh food in the dead of winter that can not only get you through winter, but also springboard your garden next summer.

This is where the cold frame comes in.

What is a Cold Frame?

What a cold frame garden container looks like

For the purposes of gardening, a cold frame is a transparent-roofed enclosure that is used to protect plants from cold weather. The transparent top of the enclosures allows sunlight into the box while preventing heat from escaping.

This simple device is a proven method for growing fresh food through winter and priming summer gardens earlier than weather permits. They take less space than a traditional garden, require less maintenance, and have the potential to provide far more food than the empty produce section at a supermarket.

The Benefits of Cold Frame Gardening and Food Growing

Cold frames are essential in every long-term survival skill set. These simple, yet effective exoskeletons help to extend the harvest timeline well beyond the first frost of the year. This means an early or late winter doesn’t impact your food supply as much as it does other people. During times when food is scarce and access is limited, a cold frame can provide fresh produce essential to survival. Valuable spices and herbs aid in adding flavor to otherwise bland foods. They can be dehydrated or serve as barter items. Plus, you and your family can have access to natural fiber, vitamins, and minerals essential to a healthy diet.

A Cold Frame garden built from Brick and Window panes

Cold frames help to promote an early growing period. Regions that have late frosts have to delay planting much longer, which creates a much shorter growing season. But with cold frames, starts can begin much earlier without the need for a giant greenhouse. Transplants from a cold frame have a greater potential to produce than if you were to wait until the last freeze of the year.

Beyond the dangers of early or late frosts, some of the benefits of a cold frame include less stress on plants, protection from wind, less erosion, fewer weeds, and easy access. If properly oriented and built with care, these units can keep plants alive longer, allow sowing sooner, and generate food during the darkest days…

A raised cold frame built with wood and plastic

The frame itself is dirt simple. The concept centers around retaining heat in the soil to allow plants to grow despite snow, frost, or even frozen ground nearby. Frames retain heat by absorbing sunlight in an enclosed space, much like a greenhouse. It can be as basic as a 2-liter bottle over a plant, or as complex as a conservatory. The most effective form for small-scale home gardens is a rectangular box about 2’ wide by 3-4’ long.

To create a cold frame, first locate a piece of un-tinted, single-pane glass such as an old wooden window or aluminum storm window. Anything before the era of vinyl windows will work well. Double-paned windows often contain Argonne gas or tinting that may interfere with natural sunlight, heat gain, or heat loss. If you’re handy in the shop, you may be able to build your frame out of wood and order up the glass to fit from a glass shop in your area. Clear corrugated plastic also serves the same purpose – let light in and keep the cold out.

If you are looking for something that will hold up better than glass, I suggest cheking out Lexan — this stuff can be shot with a .22lr bullet and not break!

The glass, Lexan, or clear plastic goes on top of an exterior framework. The framework consists of a simple, low-profile box that can be made of 2X6 studs or even plywood. Wood is joined and secured at the corners to provide a box that rests directly on the ground. Just remember – the thicker the wood, the better the insulation will be. Alternatives to wood frames might include brick, foam, or insulated metal siding. Regardless of the materials used to create the framework, you’ll want to build it to match the size of the window or glass frame you intend to use. You may be able to add hinges to lift the glass for access or install a repurposed sliding glass window.

You should have a rectangle of wood framework with a glass panel or frame on top that can be lifted or opened for access. Now, orient the glass to where the longest side runs parallel to the equator. You want to capture as much sunlight as possible and if snow or rainwater is an issue, adding a slope to the frame will make snow removal and access much easier. The orientation and a good slope will garner the best results possible.

Once the frame is built, oriented and set in place on the ground, you can remove dirt a few inches down and either direct-sow your plants or provide a layer of compost to help get the seedlings started. By starting in late summer or early fall, you’ll have better luck with a regular harvest in mid-winter. By sowing in late winter or early spring, you’ll have heartier plants to transplant into your survival garden during summer.

If extreme temperatures or limited sunlight prevents the cold frame from heating up, you can add a light, heat tape, a heating mat, or additional insulation around the frame to aid in heat retention. Zones 1 through 5 will likely need more insulation and lighting than zones 6-10. Additional insulation can be obtained through foam, additional wood, or even organic insulation like grass clippings or seedless yard waste.

Unlike a greenhouse, a cold frame allows for a heightened level of discretion. The low-profile design is easy to disguise with shrubs or debris to prevent theft in times of chaos. This means that even in an urban setting, with limited space and relatively high visibility, you could still maintain a solid level of security and still have access to fresh food…


Related:

Fine Gardening: Easy to Build Cold Frame

Gardener’s Path: 10 of the Best DIY Greenhouses and Cold Frames for Your Backyard

The Self Sufficient Living: 10 Easy DIY Cold Frame Plans to Extend the Growing Season

Tenth Acre Farm: Protect Cold Weather Crops with a Cold Frame

John Mosby on Permaculture

John Mosby of the Mountain Guerrilla blog has some thoughts on permaculture. He’s mentioned a few times in other articles, but here are two blog posts of his where he spends a bit more time expounding upon its goodness.

First is a “From the Library” post from July 16, 2019.

I get a lot of questions about why I’m so gung-ho about Permaculture, since to the newcomer, it appears to be a “society” dominated by social justice warrior liberals. While that’s not entirely inaccurate as an observation, it’s really a simplistic approach, and ignores the inherent value of the Permaculture concept to not only survival, but tribal culture.

My general, semi-humorous answer is, I’m gung-ho about Permaculture because I’m…lazy. The ideal behind permaculture, for those unfamiliar with it, is that it is “permanent agriculture.” To whit, it involves planning and planting, in such a way that requires minimal human interference, to maintain continued useful production for decades. This is contrary to standard agriculture that requires annual replanting, fertilization, and all the related tasks and inputs that go along. I like the idea of not having to work too much to produce food, because I’m…lazy.

Really though, if we’re being serious, from a preparedness perspective, this makes sense for resilience. In a post-grid environment, I suspect I’m going to be awful busy. If I can reduce my task load then, by planting a resilient, low-maintenance food production system—a food forest—now, that seems like a no-brainer to me. It’s more labor-intensive in the front end, especially if you do it like I do, without using power equipment any more than necessary, but the back end pay out is brilliant.

In an speech he did before he died, called “Liberation Permaculture” (If you do a Google Search, you can find audio files of the speech. It’s well worth listening to.), the late Toby Hemenway, author of my favorite Permaculture book to date, Gaia’s Garden, made the point that Permaculture is really the ultimate guerrilla/insurgent/survivalist form of food production, and it is incredibly anti-totalitarian…

And the second is Permaculture for Preparedness

Permaculture is famous for its ethics and principles. These are the basic guidelines along which permaculture was codified by Mollison and Holmgren. Sadly, many readers have limited themselves to second, third, and even fourth generation permaculture teachers and writers, and much has been lost in the translation, so to speak. People have learned a shallow understanding of the tactics and techniques of permaculture, without really understanding the strategy or operational capabilities.

An example of this in preparedness can be seen in a comment I received a few months ago, in which a reader lauded the discussion of alternative energy, food production, and other aspects of daily living in a post-industrial environment, but wanted me to focus on the “partisan” aspects, by which I assume they meant the cool-guy action figure gunfighter stuff. The problem with this is something that all too often, people who have never had to plan an operation, let alone write an OpOrder, overlook: you can only “operate” so long without support in the form of food, equipment, and shelter. There’s a reason, after all, that an SF ODA has engineers and medics, as well as weapons sergeants. As a mentor in SF once asked me, “What do you call an A-Team made up entirely of Bravos?” The answer? “An understrength Ranger Platoon.”

If we approach the discussion of Permaculture from the UW perspective, the focus on Permaculture begins to make considerable sense from both an operational and a strategic perspective. If we define our UW strategy as “We don’t have to win. We don’t even have to not lose. All we have to do is make sure our supporters and the unaligned populace both know that we’ll still be here when the enemy is gone,” and we define our strategic goal as “cultural and genetic survival” rather than “individual survival,” then the permaculture approach begins to make even more sense…

Related:

Eaton Rapids Joe: Permaculture and Cheap Dates

…Another factor that makes Permaculture valuable is that it recognizes that human’s do not have unlimited ability to manage. That limit is often the factor that bottlenecks productivity. Permaculture’s solution is to break the property into “zones” based on how often then need to be attended to and order them in rational ways.

For example, the path between your door and the mail box is walked at least once every day. It is the ideal place to plant everbearing raspberries and strawberries or edible flowers. Bringing in the mail would also mean bringing in a small basket of fruit for dessert or for your morning cereal.

Conversely, “the woods” might only get visited a few times a year for gathering nuts, hunting or cutting wood for fuel and construction…

John Mosby: Guerrilla Gardener

John Mosby of the Mountain Guerrilla blog has some thoughts up on getting your garden started – Guerrilla Gardener: Some Thoughts and Observations on Vegetable Food Production (Or, Gardening for Knuckle-Draggers).

One of the truisms of gardening is that “Your first year of gardening will result in abject failure.” There’s so much to learn, about the plants, about starting seeds, about your local soil conditions and what amendments are needed, about weather and climactic conditions, etc.

We had gardens when I was a kid. We successfully raised rocks, tomatoes, rocks, okra, rocks, and peas, as I recall. Of course, as any gardener will tell you, those are some of the simplest crops to raise in a kitchen garden. In fact, they’re so easy to grow, you could almost grow them without even planting them (especially the case with rocks…).

After leaving home for the Army, I had never had a garden. Hell, I’d never had a potted plant.

My wife had never, as far as I know, had a garden in her life.

So, when we decided to start raising most of our own food, to increase our sustainability, my first instinct was to raise small livestock: chickens, rabbits, etc. Of course, I’m a meat-eater, both literally and figuratively, so that makes sense. My wife on the other hand, likes her veggies, and we want the kids to eat well-balanced meals, so a garden, it was decided, was a necessity (And, to be clear, by “it was decided,” I mean, HH6 said, “We’re going to plant a garden this year!” and I responded with, “Roger that, boss!”)

So, as is my norm, when confronted with a new, unfamiliar—foreign—mission, I started doing my “Area Study” research. I dug out a couple dozen books on subsistence gardening, organic gardening, no-till gardening, and etc.

Let me set your mind at ease: there’s a metric …ton of material available out there on gardening, and it’s fair to say that any given reference book on the subject will contradict what every other available reference book will say.

In the end, between our research, and my wife and I bickering about differing visions for the farm’s production, here’s what we ended up trying…

Click here to read the entire article at the Mountain Guerrilla blog.

Sensible Survivalists: Basic Homesteading Skills My Grandmother Learned

The Sensible Survivalists have a nice article up titled The Basic Homesteading Skills My Grandmother Learned During WWII And Then Passed On To Me.  If you are getting ready to start your first garden or just beginning to move toward more self-sufficiency, it’s a good read to get you on your way.

I think the person who taught me the most, especially about homesteading, was my wonderful late grandmother.

She was a young woman in England during the Second World War. It was a difficult time for everyone, especially families. Food and resources were limited, and morale had to be kept up. She and her friends learned so many new skills in order to cope, and managed to make it through in one piece.

My grandmother passed on some of her homesteading skills to me, which has been invaluable for our own experience. Along with those skills, she taught me to be resourceful, resilient, imaginative and tough, and I’ll always be grateful to her for that.

In this post, I want to pass my grandmother’s wartime beginner homesteading skills on to you.

I think there’s something wonderful about taking the painful lessons that our parents and grandparents learnt during difficult times, and then learning and growing from them. I sometimes wish I could go back in time. I would go and speak to my grandmother, aged 17, trying to get a coop of stubborn chickens to lay eggs, and I would tell her that generations and decades into the future, her granddaughter would be applying those lessons to her own homesteading life. I think she’d be happy about that.

To put together this post, I’ve gone back through our family archives, my grandmother’s old notebooks and a few Internet sites to collects facts, pictures and lessons we can learn from today. I’ve found the old WWII posters that my grandmother will have seen at the time, and will share those with you…

TACDA: Survival Landscaping

The American Civil Defense Association has an article up on Survival Landscaping — how to use permaculture to provide food in the event of a long term disaster.

…According to Marjory Wildcraft of www.thegrownetwork.com, it is just too land intensive to realistically support a family on the hunter-gatherer system. She states: “Let’s start first off with the almost magical dream of the pure hunter/gatherer. I often hear this one from those concerned about a collapse of civilization. Just how much land does it take to support you without destroying all the wildlife and plant populations? How much area do you need in order to live sustainably as a hunter/gatherer? Since there are so few actual hunter/gathers left alive on the planet, and the few places where they do still exist tend to be jungles which look nothing like anything in North America, we will turn to anthropological data. The quick and easy answer is that traditional peoples used on average, about 10 square miles per person. Ten square miles is 6,400 acres – that is for one person.”

So what’s the answer? It just might include creating your very own self-sustaining food supply. Call it survival landscaping, permaculture, sustainable agriculture or whatever you like. The goal is to work with nature to create a truly sustainable system. A garden paradise that requires little or no human intervention once established. Due to the “natural looking” nature of this type of landscape most individuals would never suspect the amount of life-saving food growing in the tangle. Thus protecting your food supplies in plain sight.

The objective is to create an environment which requires very little human intervention once it is established.

The ideal permaculture design produces food year after year without weeding, pruning, tilling, fertilizing or using pesticides and herbicides. The system is perfectly balanced for the local climate. It is possible to accomplish permaculture landscape on a half-acre city lot as well as in a more spacious country environment. Permaculture takes many years to establish and become resilient to changing conditions.

Selection of plants is critical to take best advantage of local climate conditions, ensure natural balance and to extend the harvest throughout the entire growing season. There are a growing number of great reference books to guide you through the process. Many of the authors recommend a more “natural or wild looking” landscape which is perfect for a remote bug out location, but may not be welcomed in a gated community…

Click here to read the entire article at TACDA.org.

Related Resources:

The Prepared Homestead – Provides permaculture training, assessment and design.

Strategic Landscape Design – Provides land planning and permaculture consulting.